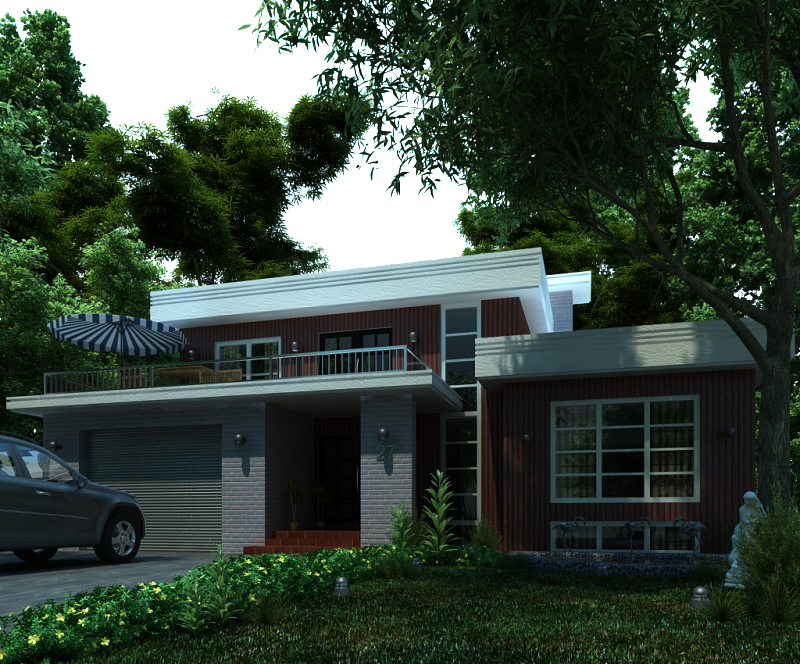
2. Open any background (I got this image at 1000skies.com) Then place it behind your render. A prompt will be shown that the target document has a different depth than the source document etc. Just click Yes and rescale if possible
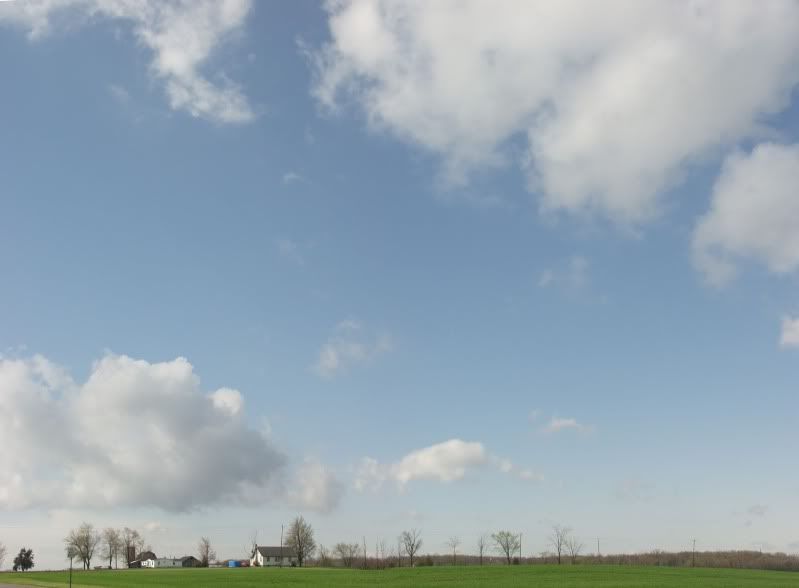
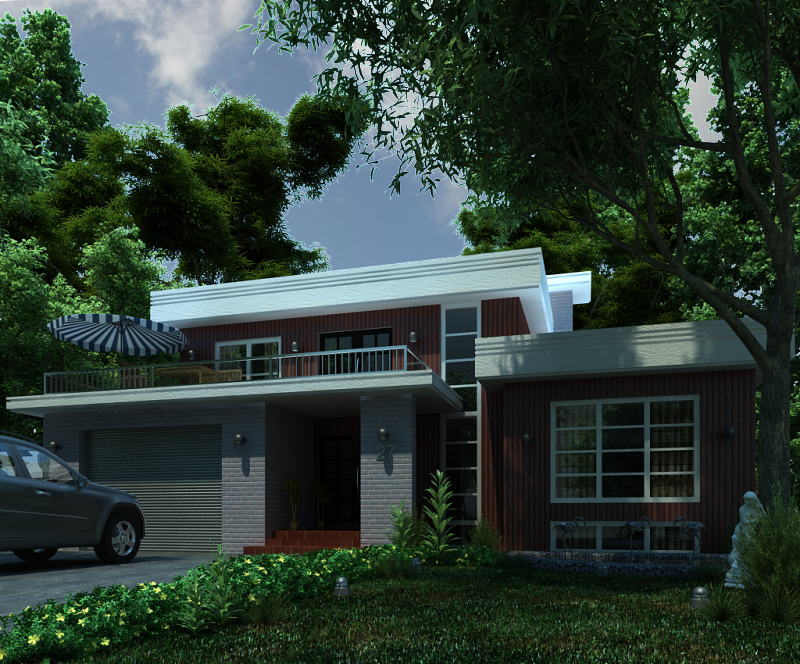
3. Click the background layer then hit Ctrl+M (Curves) to adjust the brightness, contrast of your backdrop (see Image below)
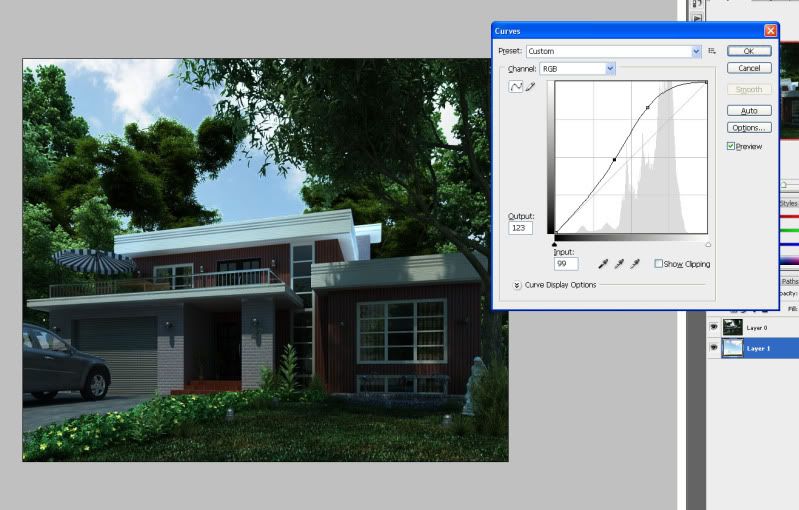
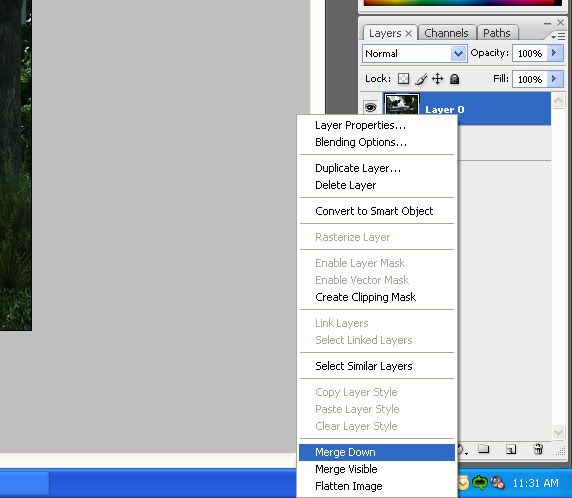
4. Once you’re satisfied with brightness, go to Layers>Right Click your render>Merge down
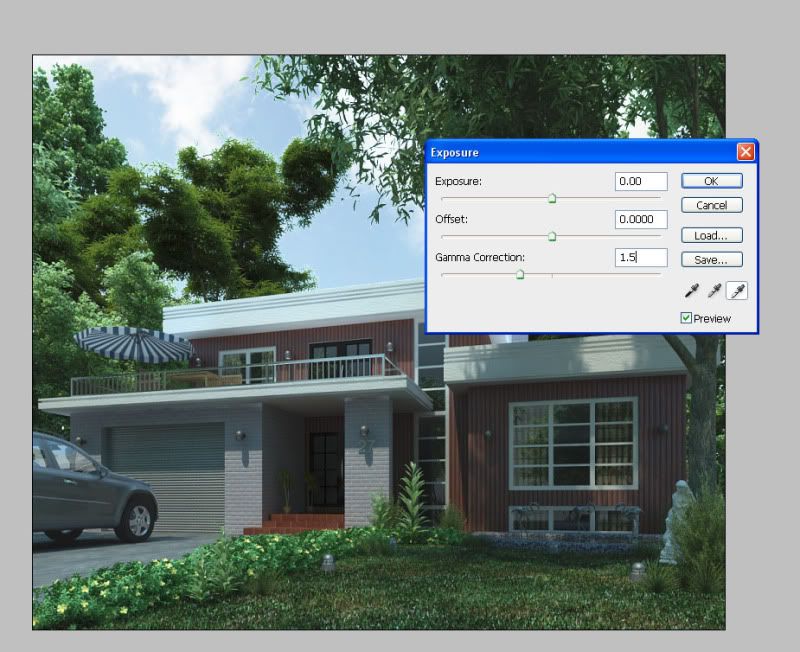
5. Now once your done with merging down, we’ll make our render edit its Gamma; Click Image>Adjustments>Exposure; a dialog box will open,
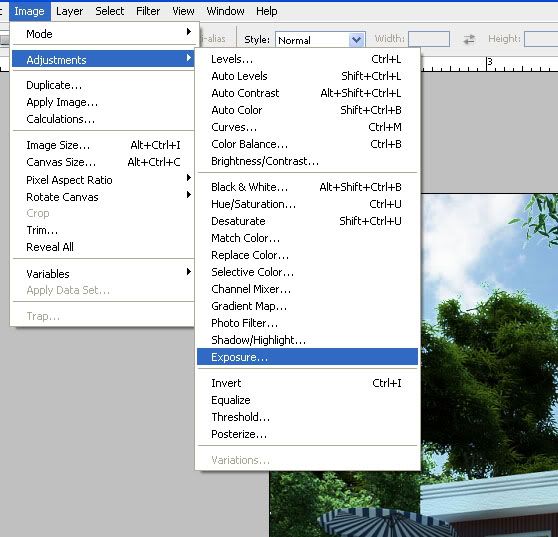
set the Gamma Correction to 1.5; dont worry if your render turned out to be very bright, we’ll fix that later ok?
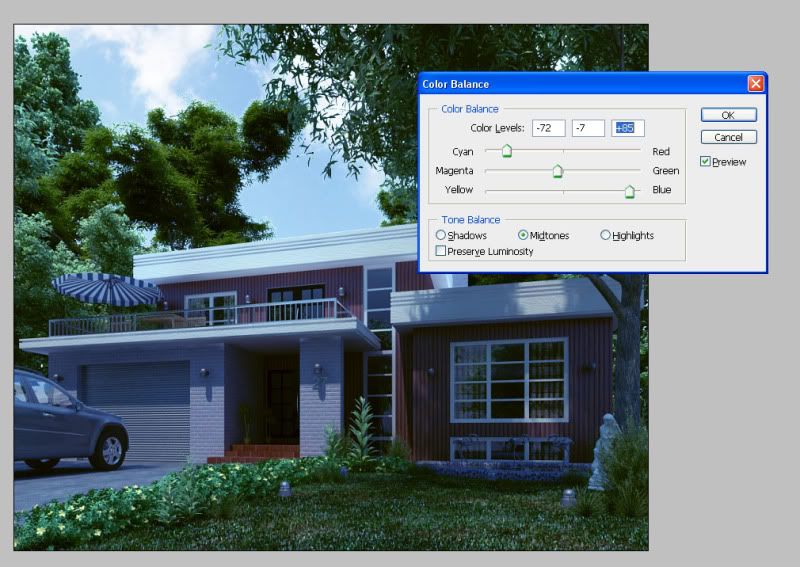
6. Now, next is Color Balancing (my favorite part… hehehe). Here comes the color styling part, well this depends on your taste, but as for bluish tint preference, here’s what you should follow. Hit Ctrl+B (Color Balance)
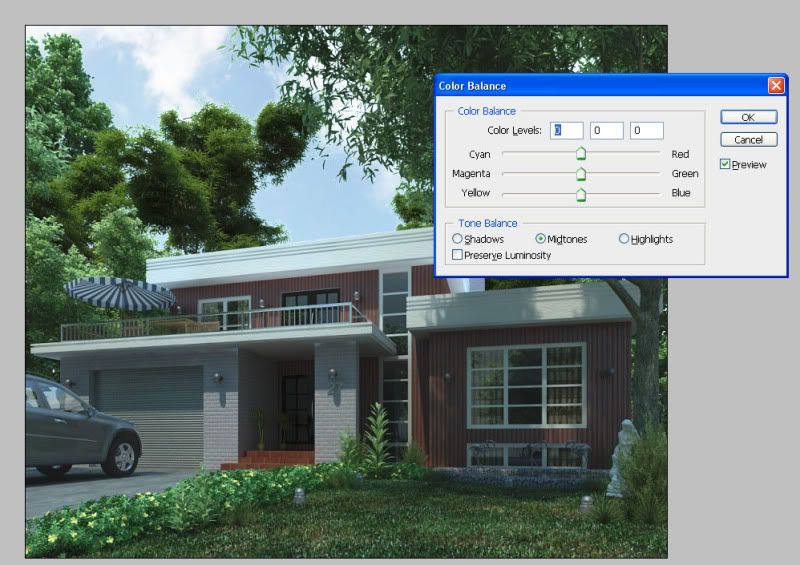
On the bottom row, Under Tone balance click on Shadows radio button, adjust sliders as shown below
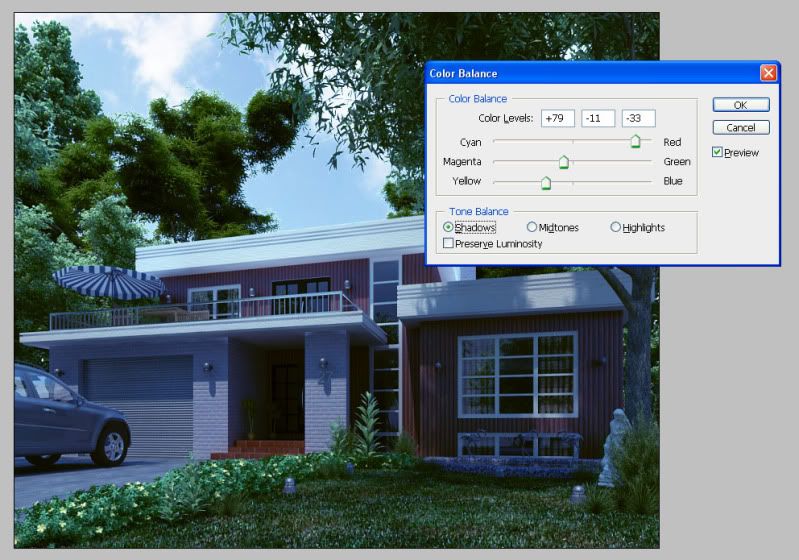
Now click Midtones radio button…
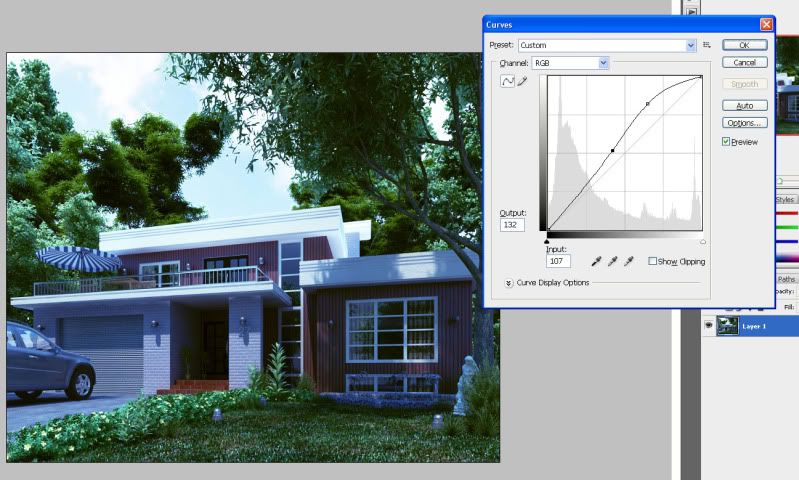
7. Hit Ctrl+M (Curves) adjust as necessary (for contrast I guess)
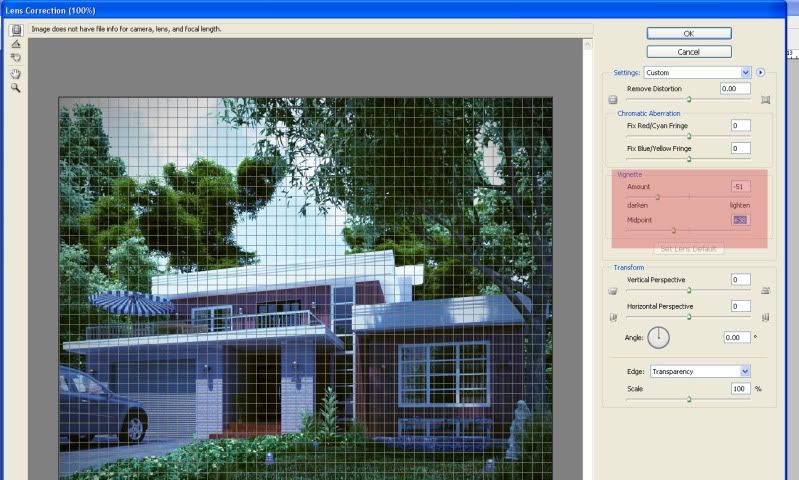
8. Let’s put some vignetting on our render but not too much. Click Filter tab>Distort> Lens Correction
Here’s what you should have right now…
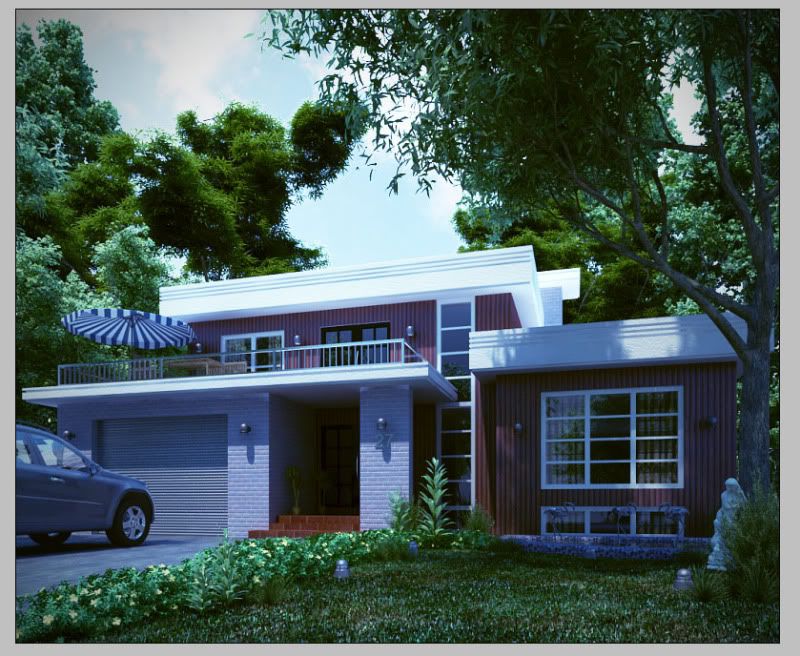
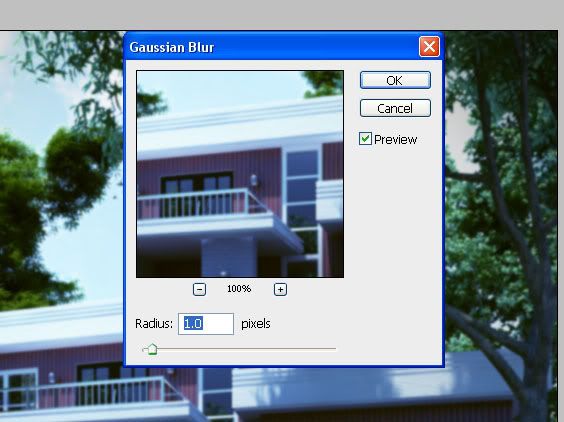
9. Give it some Gaussian Blur… Click Ctrl+J to duplicate the layer then go to Filter>Blur>Gaussian Blur…
Just give it 1 px
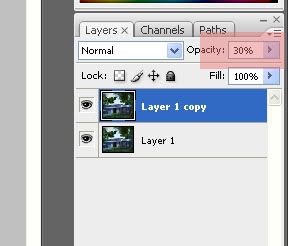
Change the Opacity to 30 then Merge down again…
10. As for the flare, in my previous post, I used Knoll Light Factory Plug-in for Photoshop but this seemed to be inapplicable right now coz i dont have that plug-in here in the office. Now lets try something else..
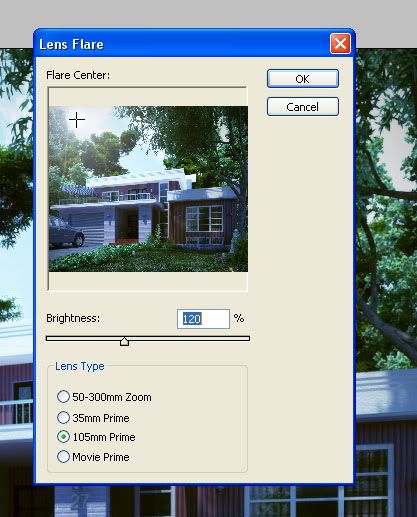
Here’s what you should have right now…
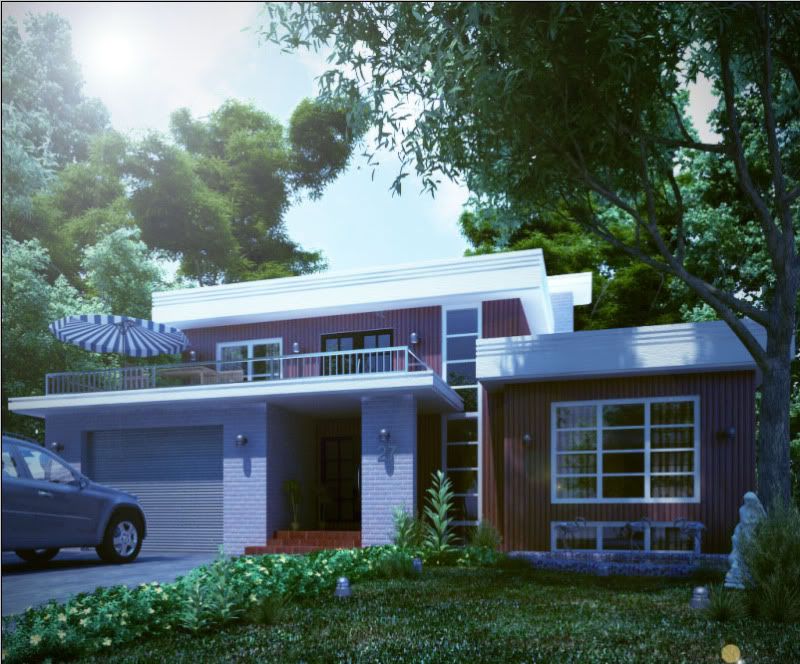
11. Now we’ve come a long long way… few more to go… Let’s add some spice with the render by giving it Chromatic Abberation.. giving CA too much will destroy the beauty of your render. Here’s my process of putting CA on my renders. Hit Ctrl+J to duplicate layer, then go to Filter>Distort>Lens Correction and adjust as per image shown below
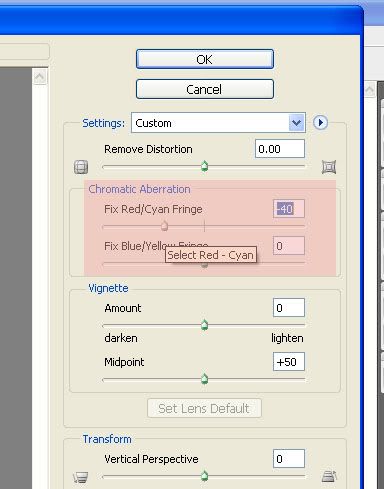
12. At the bottom part of the layer Click Add Layer Mask then Click “B” to activate brush tool
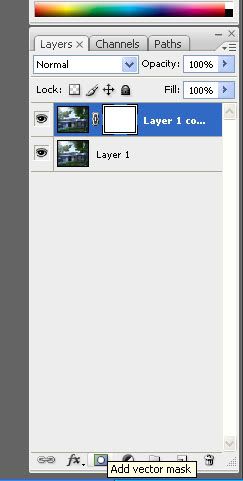
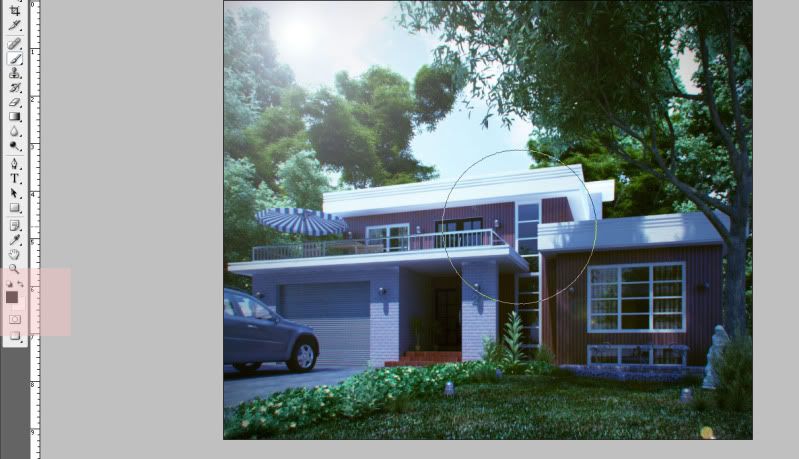
13. Now make sure you have black color selected (look at the highlighted part on the left) then start brushing through your house model, leaving unbrushed be the one with CA effect in it…
14. As you will notice this time, beside your layer, the effect of layer masking..
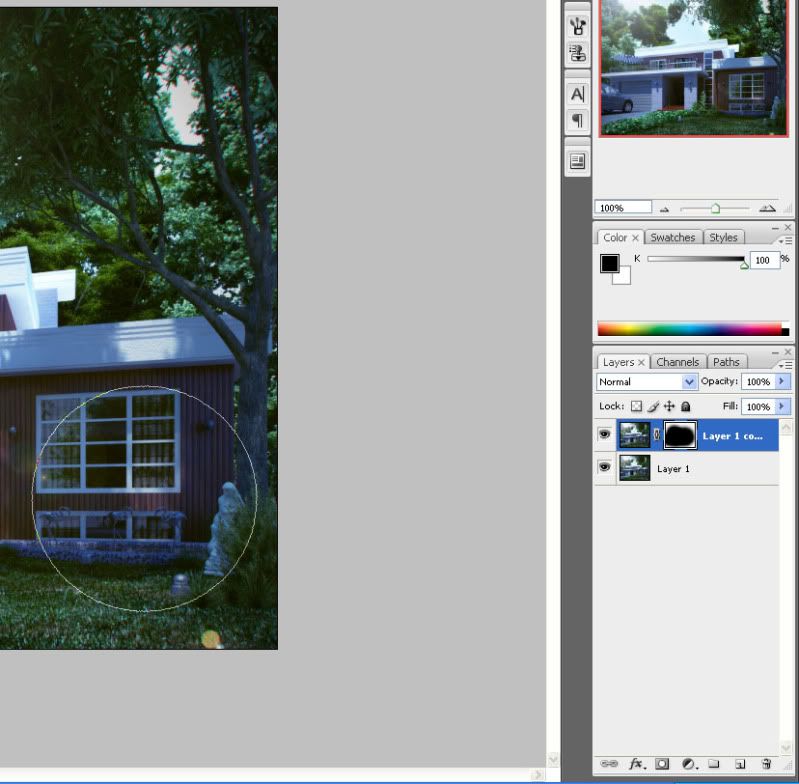
15. Here’s what you should have right now after merging down.
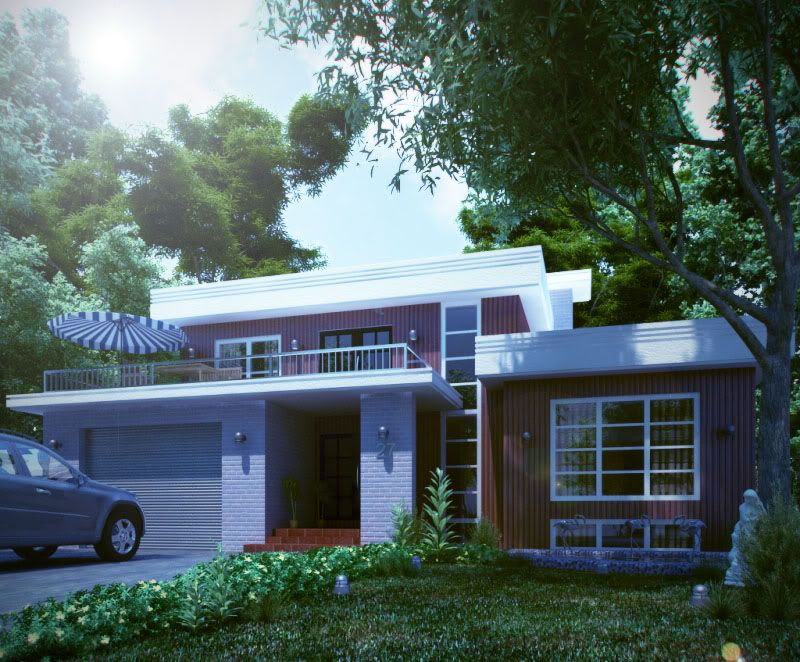
16. Hit Ctrl+M again for some adjustments then Sharpen your Image (Optional). And its done… Post!!!
Final Image
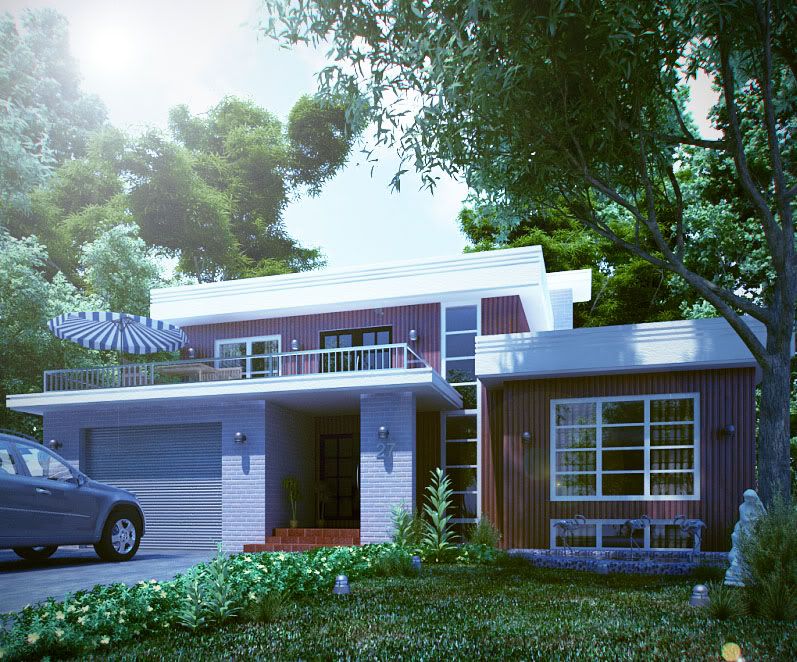
Hope this helped you in a way… Open for any criticism if you feel you are mislead. Goodluck and happy Post-processing!!!
![CG [M]arket3d](https://blogger.googleusercontent.com/img/b/R29vZ2xl/AVvXsEgH-KRE13TNft6PCKzU2A9XNxdqZ-tSDwP5uiCsPa9Xn0d_k7Tol7x1f2BFik00i9y5nsoMcpAmlu69aMnGhK0tiQTZAfyq_GKX_iDLnpLvnQ-LBNaiMg-KI3joIpWkESj0CZpvaRh0hL8/s1600/Untitled-3.png)



Post a Comment